A Few Notes on Lava Photography
Lately, Pele, the goddess of fire, has been showing itself to us in all its fiery glory. Hence, those usually photographing and/or reporting on a lava flow on a regular basis have been quite busy, and (I guess) excited.

But what about the rest of us, those of us interested in seeing Pele in action, but who cannot just pack our bags and fly to Hawaii on a moment’s notice?
Guess the short answer is: the rest of us photograph lava whenever we get a chance.
Several years ago I had the unique experience of visiting the Hawaiian islands. That’s when I got to see lava, in all its forms.
A few things to keep in mind when planning a visit to Hawaii, which includes a visit to Hawaii Volcano National Park to photograph lava:
- if you plan on visiting Hawaii, by all means make time to spend a few days on the Big Island, also known as Hawaii Island
- while on the Big Island, go visit the Volcano National Park, regardless of lava activity; there’s plenty to see in the park and chances are that you will get to see lava, too
- before you go photograph lava, do your homework: you can see Pele in action and smoking lava fields from the air, from a boat, or up close and personal, while in the Hawaii Volcano National Park
A few things about the Big Island of Hawaii:
- of the eight Hawaiian islands, Big Island is the closest to the continental U.S.
- while all are volcano islands, the Big Island is the only one that still has live volcanoes; for now, anyway
- while visiting the Big Island, you can enjoy anything from sunny beaches to snow-powered craters, and experiment all the climates present on Earth, minus the two most extreme ones;
- there are two main cities, towns perhaps, that you should visit: Hilo, on the East Coast of Hawaii Island, and Kona (famous for Kona coffee) on the West Coast; in between and on the southern side of the island there is a stretch of green lava beaches (most lava beaches are, you guessed, black)
- if you’re interested in visiting the Hawaii Volcano National Park, spend a few days in Hilo; the park is a relatively short drive away
In order to see and photograph lava, it’s a good idea to drive to the Volcano National Park during the afternoon or later in the afternoon, so that you can capture the lava at dusk, and then at night.
What to bring:
- taking into consideration that you’re in Hawaii not only to photograph lava, you have no choice but to make it happen (make the lava pictures happen) with whatever gear you have available: camera, lens, tripod, or at least monopod
- consider bringing only a monopod–it’s lightweight, easier to carry, and you have a better chance, in certain places, to be allowed to use a monopod rather than a tripod
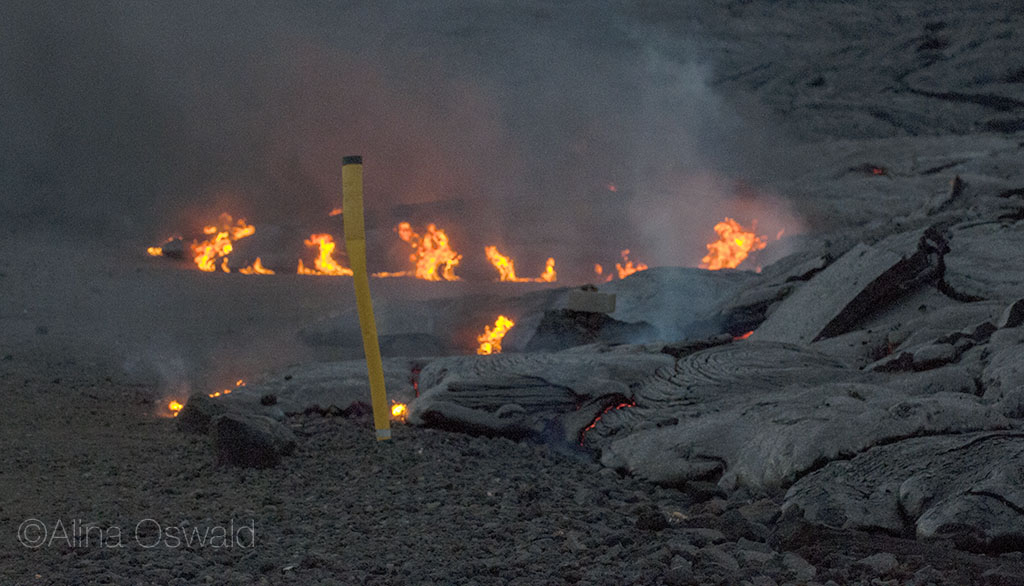
- consider bringing a zoom lens (kit lens, if there’s no other choice); keep in mind that park rangers will not allow you to just wander around, freely; that’s mainly because lava flows on the surface of the crater, and solidifies, creating lava tubes; while the outside of the lava tube might appear solid, inside the tube molten lava might still be flowing; by all means, do not step on a lava tube, you never know what’s inside. Park rangers usually mark the areas open/closed to visitors.

- photograph lava when there is still some daylight, and as the sun sets below the horizon line; if you want to include more of the scene, not just a close-up shot of the lava, try to photograph right before the sky becomes pitch dark (which can happen pretty fast)
- bring a flashlight! And a friend or loved one or fellow photographer to light your way on the solidified lava (I’m not kidding!). It does get pitch dark.
- if you use a long lens, like I did (Nikkon f/2.8 70-200mm lens), you might find it difficult to handhold and shoot in very low-light conditions, even though this lens is an exceptional lens; that’s when you need a tripod or someone’s shoulder to keep your camera/lens/hand steady when photographing (I remember there was a nice young guy who offered to let me use his skinny tripod, I politely refused because I didn’t want to damage his gear)
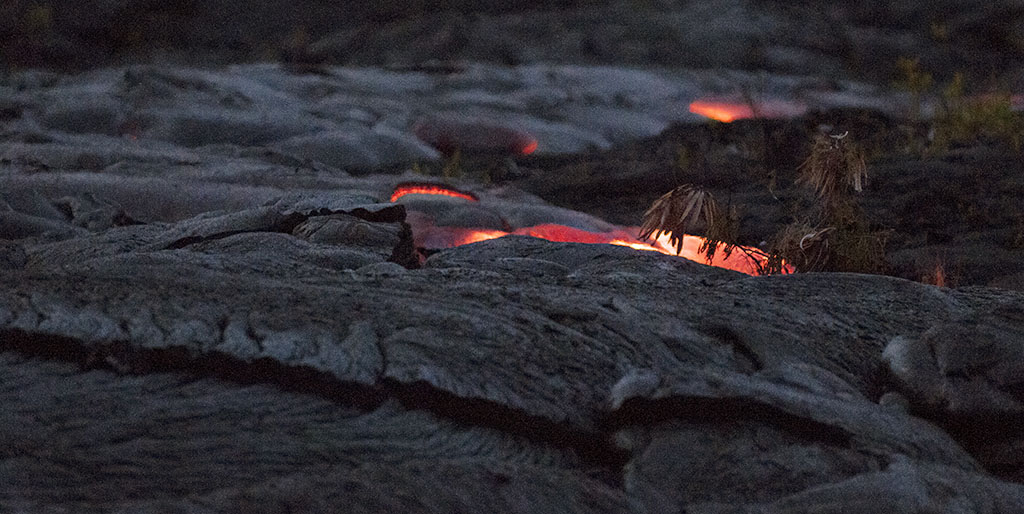
- zoom in/out when you photograph; look for the big picture, as well as for details. On its slow flow down the crater, lava usually creates forms and shapes that change from one moment to another. Try to spot these shapes and photograph them as they change.
- although it might be tough at times, try not to overexpose (too much) the molten lava; also, it gets pretty dark, so you might need to use Manual Focus
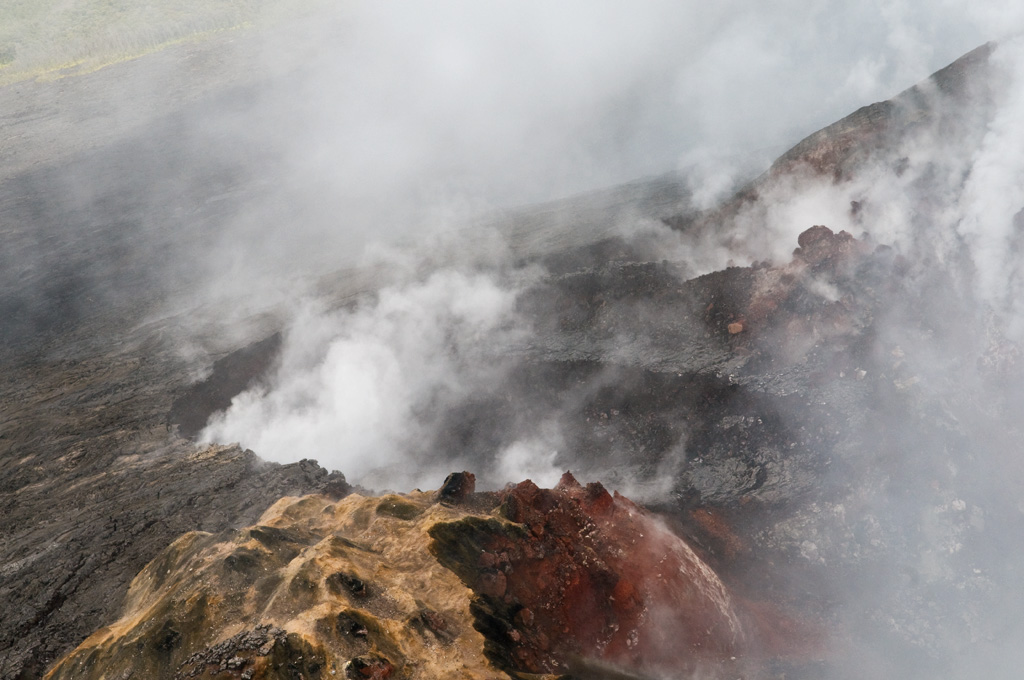
In the images posted below, I captured lava taking various shapes and forms, while shaping the island, adding new land to the island. Some of the images are captured from a distance, like the heart-shaped lava below.

Other lava shapes are captured up close and personal, as close as allowed by my zoom lens.

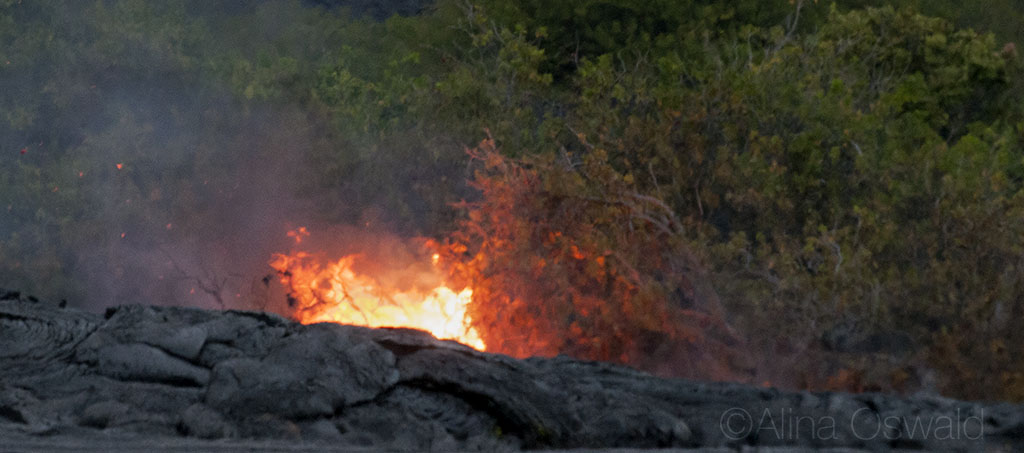
Pele, the goddess of fire, is a goddess of destruction and creation (D&C). Lava (Pele) burns and destroys trees and plants, sometimes even houses, on its way down to the ocean, where it solidifies, upon contact with the water, creating new land, and adding to the island. Pele’s is a work in progress. Witnessing it is a humbling experience.

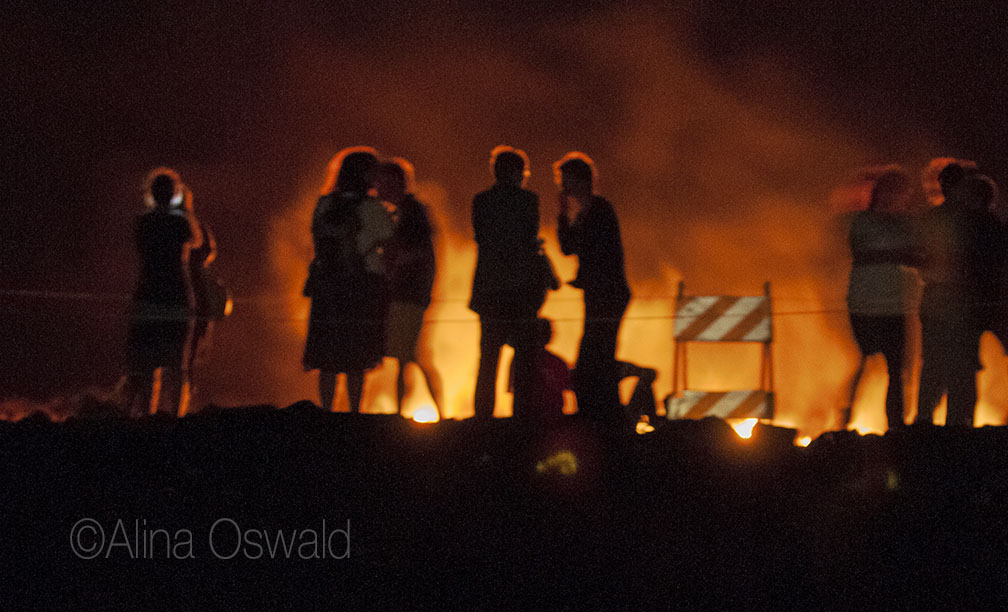
On my way back to the car, I turned around to take one last look and noticed the people, silhouetted by lava light.

As I mentioned at the beginning of this post, one can also photograph lava from the air. Here are a few images. Some of them were part of a juried photography show at SoHo Photo Gallery in New York City.

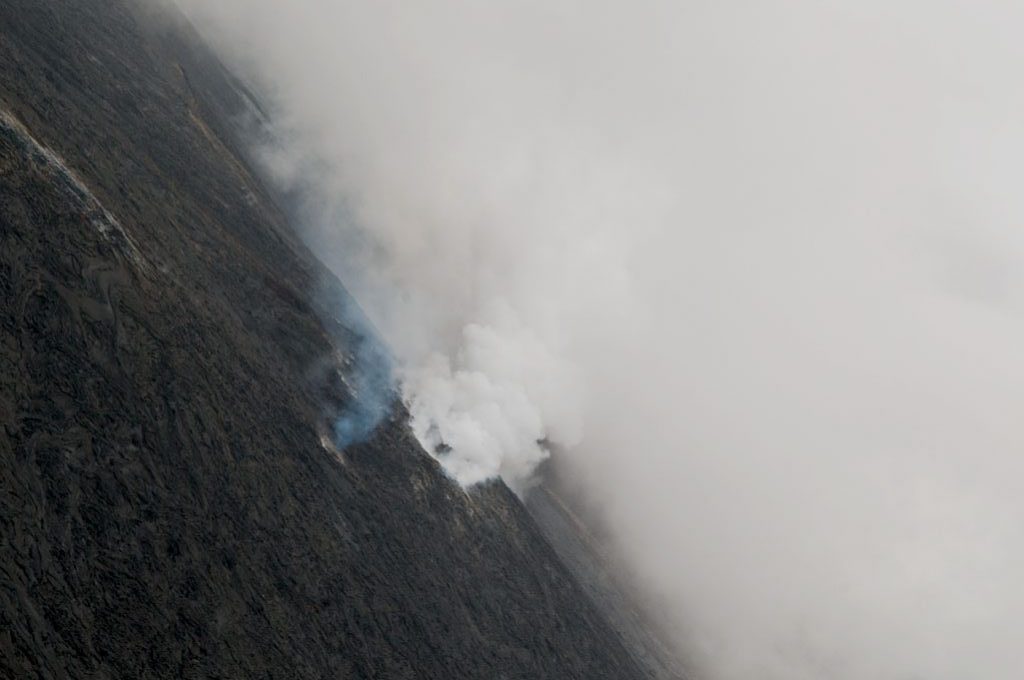


Why, you’d ask, someone who usually photographs portraits and editorials, like myself, would choose to photograph volcanoes and lava? For one, because I think lava, or I should say, Pele, the Goddess of Fire, makes an interesting subject to photograph. Two, because one can learn from photographing something outside their areas of expertise. Three, personal projects could open the mind and eyes to new possibilities.
Finding oneself surrounded by Mother Nature, like one often does when in Hawaii, one often becomes aware of our humble place and also a role, as humans, on this planet, in the home of Mother Nature.
As always, thanks for stopping by!


Leave a comment